I finished Picnic, the seventh design in The Red Thread.

I'm not sure that I like the snap on the flower, but I am completing it as designed.
Here is a picture of the whole thing so far.

Next is "Ocean Voyage".
I finished Picnic, the seventh design in The Red Thread.
I'm not sure that I like the snap on the flower, but I am completing it as designed.
Here is a picture of the whole thing so far.
Next is "Ocean Voyage".

Next, I transferred the pins into the sides of foam, so the sampler could be turned over.


Finally, I got it all laced and the corners stitched down.
When I turned it over it looked reasonably even.

Next, I cleaned both sides of the glass with warm water.
I laid the frame out on the table and placed the glass it it.
Because the sampler should not touch the glass. I needed to make spacers from the acid-free foam board. This actually turned out to be one of the hardest parts. I experimented with various shapes and finally decided that a right-angle shape worked best. I wedged these little pieces of foam-board into the corners.
Then, I took the opportunity to remove any remaining cat hairs off the sampler! LOL! It is really best if you can have the cats out of the room while you are doing this! Ha! Good luck with that! Those of you who have cats know what I mean! I have 6 of them!
Finally I placed the stretched sampler into the frame and covered it with another piece of acid-free foam board for the backing.

Next, I covered the back of the frame with brown paper to keep the dust out.

After the adhesive dried, I attached the eyes and wire for hanging.
The only thing left to do now is record the information about the sampler on a piece of paper and attach it to the back of the frame.
That's it! Finis!

When I was considering this design originally, I wanted to change the colors a bit (less green and lavender, more vivid shades). The reason I didn't was because the colors are so intricately woven together! It is hard to see from the picture, but the shades make it seem three dimensional.
Even as I am stitching it, I don't know what it will look like until I have finished the section. Then it looks different again when it is back-stitched! Even the blue scrolls at the top of the first line take on a lot of depth with the two shades of blue.
I was wondering what this design would look like in silk, or with the hand-dyed cotton floss. Actually, the colors chosen, create a similar effect.
I will be leaving this for a while. I need to stitch another box on The Red Thread to keep up.
Also, I have made a lot of progress on framing The Chase. I will post the pictures just as soon as I get them out of the camera

The top of the S is some sort of long-neck bird, and the bottom has a little green-faced guy sticking out his tongue!
Hard to see here, but I have used blending filament around the initial. I wish it was a little brighter.
Then, the entire thing was outlined using a back-stitch.
Next I will be moving to the right, finishing up the first line, and some scrolls that are over the first line.
This looks as if it will be a bit less complex, so maybe I can make some quick progress.

I started in the center and worked my way up to the top.
In the upper left-hand corner, there is some sort of ferocious little beastie!
 ... and in the right-hand corner, there are some inter-twined serpents!

This is not going to be a quick stitch!
 I made a small start on it.
 I am using DMC with some Kreinik blending filament on Antique White Permin/Wichelt.
Before I started it I was trying to think of a way to change some of the colors.
There are a lot of pastels, light greens, and lavenders. I would have prefered to see some more vivid colors, blues, and a touch of red. I couldn't work out how to introduce those colors without changing everything, so I left the colors as they were designed.
I have actually gotten a bit further along since I took the picture. I think this will be a slow stitch because there is just a ton of back stitching! Almost every area needs to be back stitched.


I sewed on just a few of the little snaps and buttons on the border to see what they would look like. I'm not sure they improve the design or not.
I like the snaps in the various designs. It is perfect in "Road Trip" to designate a round-about or exit, but I'm not sure about them in the border.
I'd like to get ahead on this one because I would like to use it as a holiday decoration. To do that, it would have to be framed. At the rate I am going, I will finish the last box by December!
The next one is "Picnic".


I just realized that I forgot the stitch on the girl rabbit's nose! At least, I think she's a girl! I think the one with the cape is a guy and the one with the heart is the girl.
What do you think?
It's coming along slowly. I had to take out parts of it which cost me some time. I am finding that there is quite a bit of eye strain on this one. The linen is very dark, and the thread is very irregular on this fabric. With a thread count this small (35 ct), it really helps if the threads are more uniform. It makes it easier to count.
I would guess that I am a little more than a third finished.


Here is a picture of the whole thing so far:


 I think this one is much better with the rabbits together.
This is my progress so far...
 He looks like a kangaroo here!
The linen is 35 count Blackbird from R & R Reproductions.
I decided on DMC. I had considered using silk from Hand Dyed Fibers. They have a package put together for this design, but the colors seemed too dark for the dark fabric I am using. Also, I think this type of folky design is better suited to the cotton.
It has been a little hard though. I am using two strands of DMC. The holes are very small in 35 count. I have done a lot of work on 35-36 count linen, but this is the first time I have used the dark color with this fine a count. I have noticed it is a bit fatiguing, and my progress is much slower.


I am stitching it on 32 count Light Mocha. I decided to use DMC instead of the hand dyed threads. I think the DMC looks just fine, and I have the all the colors on hand, which is a plus.
After working on The Chase Sampler for five months, I needed a little change of pace, something lighter!
This is what I have done so far.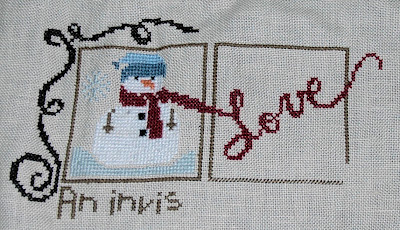


I will have to go to the framers for the frame because of the unusual size. It is about 17" x 25".
I have been collecting frames for years, and yet somehow I never find the right one in my attic!Here is the finished sampler. Not the greatest picture. I will take another one when it is framed.

 Click on photo to enlarge.
I enlarged, and lightened the signature and verse section to try to see the spelling of the name.

That is how I am going to stitch it!

 I have used some straight pins to measure out the eight, quarter and halfway points along the line to try to get an idea of the spacing.


 I have finally gotten a copy of Village-by-the-Sea"!


 Posts
All Comments
Posts
All Comments


