Thursday, September 20, 2012

TUSAL and some progress on Deep Peace


Hi Everyone,

I never meant to be gone so long! I have been very distracted with medical appointments, and other such annoyances!

He is my long overdue September TUSAL:

Lots of colors here!

There is some progress on Deep Peace, but it has been slow going. This is not the kind of piece you can work on when you are overly tired or distracted. I found that I was making a lot of mistakes so I put it aside for a few days.

I finished filling in the big "D".

click pictures to enlarge

I still think the top filling is too dark. It seems to obscure the dragonfly and the butterfly, however I am leaving it alone for now.
Next I worked on the 5 "eep Peace". The directions call for the "eep Peaces" to be a darker color brown, and the rest of the verse done in a lighter shade, however I decided to complete the entire verse in the same color. It seemed to be more cohesive that way.


There is a blue wave over the first line, and some wavy design on the top that is made up of back stitching and cross stitch.

Next I stitched the little designs on the corners of the "D".
The horizontal box on the top was stitched with a diagonal Queen stitch.


The vertical box on the bottom of the "D" was done in Satin stitch.

Next came the illuminated initials for the last two lines.

After that, I worked on the curvy scrolling lines in celery colored silk.


I put my initials and the year above the last line. The designer embroidered a very curvy '98 there, in the same style as the curvy lines below. She put her initials in one of the Forget-me-nots on the edge. There was no way that I could have made a '12 into those curvy lines, and I wanted all the forget-me-not corners to be alike, so I put both initials and date here. I hope it isn't too abrupt of a style change.

So here is where I am with it so far.


 I am beginning the vines at the top, but I was making so many mistakes, I had to stop. I am picking it up again this evening, so hopefully I can get some more done on this. It is coming along, but oh, so slowly.

I received my metal supplies in the mail.


Oh boy! More fun to come! Stay tuned!

Thursday, August 23, 2012

I am not sure I like this background.

After frogging, re-frogging, and frogging again, I finally finished the area inside the big D.
The forget-me-nots proved to be challenging because the chart showed the easier choice, rather than the written directions. I decided to follow the  written instructions which were considered a bit more difficult.
The forget-me-not is made up of 3 different parts. In the center, there is a tiny gold eyelet. This is surrounded by 12 tiny cross stitches (one over one). This area is surrounded by satin stitches, of varying lengths using the silk.

The buds on the stem are made with Smyrna stitches.

At the top, there is a dragonfly in the upper left, and a butterfly in the upper right. These are both done in silk with satin stitches. At the ends of their antennae are petite French Knots.


The background stitch is done in a darning stitch. There are 5 colors of cotton floss used here. The top is the darkest, which fades to the lightest color at the bottom. I can't decide if I like this or not, It seems to muddy it up a bit. It is harder to see the small details.

Here is the whole thing so far:


Not sure if I like it, but I don't know how it would be without any background. Maybe it should be lighter?
Just don't know.

On a different note, we had some eggciting news!

Gretchen presented up with a little egg! She is about 2-3 weeks early. I understand that sometimes they do that before the regular egg production begins.

It is a perfect little, light brown egg! It is hard to tell from the picture, but it is much more slender than a normal size egg.


That's all I have for today.
I hope you have all been having a nice summer!

Friday, August 17, 2012

TUSAL, some groaning, and a small finish!

That time again!

Here is my August TUSAL:

You see these guys?
FROGS ! ! !

They love Deep Peace soooo much, that they have decided to live here permanently!

Here is my progress (though you could hardly call it that)!


I have officially spent more time frogging this than I have stitching it! AGGGHH!
You would never know it from this rather innocuous looking picture, but a great deal of drama has played out on this little piece of linen! I was further along. I even had one of the forget-me-nots partially finished, but it all had to go. I had all kinds of problems with the stem. It definitely looks a little different than the picture. Something in there has gone very wrong, but I will be darned if I can find out where it went off the track. Also, I think mine is a little wider than the directions say it should be. Also I don't particularly like the dramatic differences in the green of the stem and leaves. I would prefer it to be a more subtle change in color. I refrained from frogging it though because I have had enough of that!

This was giving me such fits! I was very frustrated. That, combined with my insomnia induced jumpy eyes, I decided to take a break.

I always keep one of my easy little projects nearby for just such a situation.
I pulled out The Most Wasted Day, and finished it!

The Most Wasted Day - Erica Wilson 1972

I know, it's a silly little thing, but I love the crayola colors!

Well, I can't say that I have particularly enjoyed our summer weather this year, but atleast my Clivia has enjoyed the humidity. I was so pleased that it bloomed. Last year it didn't bloom at all. In fact it has been almost 2 years since I got a bloom. When they do bloom however, they are quite spectacular.
I will leave you with this tropical picture:


Happy stitching everyone!

Saturday, August 4, 2012

Some progress on Deep Peace

I have finished the outer part of the initial. It was a bit easier once I finished the border.
The blue in the upper, middle and lower parts of the initial are done with Anchor 134, 133, and 132. Although the DMC equivalents were given, I chose to stitch it with the Anchor colors. The blue is graduated from dark to light so subtly, that I decided not to try to match the colors.
This is a somewhat pricey piece. There are many Anchor threads called for, as well as I think, 7 different shades of Silk 'n Colors, plus the metallic threads, gold purl and the gold and silver paillettes.

This is what I have so far:


Most of the initial is stitched one over one, but the border is cross stitched over two threads with Periwinkle Silk 'n Colors. The outermost row is stitched with two threads. The rest is all done with a single thread. In between the last row, there is a stem stitch done all around in Camouflage Silk 'n Colors. It is the dark line going all around. This color ranges from bright green to brown. I wasn't too sure how it would look because I kept getting a lot of dark brown, but I think it turned out ok.

It is hard to see it from the picture, but the lower part of the initial features evergreen trees against the blue, on both sides.

This is a blow-up of the lower left-hand corner. It shows the trees


This pictures also shows the tails (ornamentation) coming off the initial. I am not thrilled with the way they came out, It is very hard to see them.They seem to disappear into the threads. It is supposed to be back-stitched with a single thread, but I think I may try it with two threads to see if it looks better.

That's where I am now. The next step is to fill in the center of the initial, starting with some grass at the bottom.

Hope everyone is managing to stay cool in this weather. I am so done with summer! I am not a fan of the hot weather, and this summer is just relentless with the heat! I am looking forward to fall, my favorite season!

Friday, July 27, 2012

Okay. Now I do like a challenge, but . . .

I just cannot follow these directions as published!
In fact, if I had started with the border of the letter, it would have saved me a lot of time and frogging.

This is what I have so far:

The directions directed you to finish the D first, then do the corners. The border is to be done at some later time. This didn't work for me. I had to stitch atleast part of the border.
The problem is that there is no good picture to go by.

The stitching is mostly one over one, but the border is one over two. Where these two meet, is the problem. There is space left between them. In the upper right hand corner, it is hard to see it, but there is a moon there. The background is one over one, but where it meets curved areas, the space is not entirely filled in. I am not sure whether to fill it in with one over one, or leave it blank.
The directions are not clear.

I think I am going to go off grid here (literally), and just make it up as I go along.
Also, there are supposed to be tails coming off the letter that wind around into the border. This was supposed to be done, but I just didn't see how it could be done until the border is in place.

Well atleast the pulled eyelet turned out well. I am happy about that.

Has anyone out there stitched this? I would love to see some pictures and hear from you

Agghh! All of this has been very tough on these aging eyes!

I will keep you posted with my struggle.

Thursday, July 19, 2012

TUSAL and Deep Peace

My jar is starting to get very full!


You see the light gold threads at the top?
That was my new start. - Not fun frogging one over one stitching!

I have had Deep Peace in my stash for years. I decided it was finally time to stitch it.

Deep Peace - Forget-Me-Nots In Stitches
by Lauren Sauer 1998
I think the reason I haven't started it before is that I find it quite daunting! It comes in a booklet form, and the directions are largely written. Although many helpful diagrams are included, it is very different from the usual type chart. I have the utmost admiration for the designer for attempting such a complex design.

Unfortunately the only picture included is very small one on the cover. I have enlarged it here so you can see the detail.

I started on the initial as the instructions suggest.


Not much to show. I had more before I realized I was following the wrong chart. It is all one over one. I was using the smaller overlay and didn't realize that everything was shown one over two! Ugh! Lots of frogging! I was considering buying another piece of fabric and starting over, but the materials for this project were quite pricey, so I thought it best to do the frogging.

One of the things that I am apprehensive about is working with real metal. It calls for gold purl for parts of the initial, as well as real gold and silver paillettes. These were a special order and I am still waiting for them.
I am nervous about this one! I really want to do a good job on it.

Well, I will let you know how it goes. Hopefully there will be no more frogging in my future!

Monday, July 16, 2012

The Sarah Whiteley Sampler is finished!

Yea!
It would have been a day sooner but I discovered to my horror that the border did not meet up.
Every stitcher's worst nightmare! It took me a bit of fiddling with it, but finally, with some creative stitching, I managed to get the ends to meet. Hate when that happens!

Anyway, here she is:
The Sarah Whiteley Sampler
Stitched with DMC on 32ct Natural linen

The chickens are giant! The rooster looks like he can peer into the second floor windows on the house!
I had fun stitching this one! I love the colors. I am always partial to red.

I had some trouble photographing this one. This was part of the reason:


Furrytail was hungry, and was not to be ignored!

I want to thank you for all of your comments. I love reading them. Will let you all know how it goes with the chickens. We are looking forward to our first egg somewhere around the middle of September.

Wednesday, July 11, 2012

Sarah's house is finished!

I also finished the floral motif in the left-hand corner. ( I am  not sure what that little basket looking thing is).
I still have a few more flowers to do, and then it will be on to stitch the giant chickens!


Speaking of giant chickens, I took a few pictures of my own giant chickens.

DeeDee
Millie

Dotty
Gigi

Gretchen


Andy (Formerly known as Annie)
Bonnie

Sally

Sunday, July 8, 2012

Any Jane Austen fans out there?

This will make you drool !


Jane's ring
How cool is that?


Sotheby's is auctioning it off. You can read about it here.
I would love to have this!
I mentioned to Keith that our anniversary was coming up, but it seemed to fall on deaf ears!

Friday, June 29, 2012

Sarah's tree is finished!

Why is it trees always look so simple, but take so long to stitch?
This one is filled with some very colorful critters! First I though they were all birds, but now I think that yellow one might be a 3-legged cat. I guess that is better than a 3-legged bird?!?
I am not sure about the purple one at the top either.

I also finished the little basket on the right. The bottom is cross stitch, but the top is done in an eyelet stitch.

I also finished her roof with the chimneys.

The verse is hard to read here. It goes:

Sarah Whiteley Is My Name And With
My hand I Work The Same I Have
Done This To Let You See What Care
My Parents Takes of Me But When
I Ham Dead And In My Grave I Hope
You Will This favourit Save

Well, that's all I have for now. We will probably have a quiet weekend and holiday. I don't like to drive anywhere on these holiday weekends. I just can't stand sitting in traffic anymore!
Hope all of you have a wonderful weekend!

Wednesday, June 20, 2012

June TUSAL and more Sarah

June is almost gone! Time is just zooming by. The 4th will be here before we know it!
Here is my TUSAL:


Lots of light blue in the jar here from the verse on Sarah.

Click to enlarge

Hard to read the verse here because it is so light. I have one more line of it to finish, then on to finish her signature line above the crown. The top and bottom of this sampler are so different. The top is rather traditional and formal, but the bottom part, below the crown is much more random.
I am happy with the progress on this one. It seems to be moving along alright.

Looks like we are in for a couple of hot days here. Hope everyone is able to keep cool!

Thursday, June 14, 2012

L'Automne est finis!

Finally! Yeah!

I have to say that I found this very difficult. I'm sure that part of it was that I stitched it one over one, but the design itself was very curvy with the winding vines, etc. I do not think I have ever made so many mistakes on a design, at least not in recent history.
There was a lot of improvising going on here, especially towards the end.

Here she is. Sorry about the crooked picture.

L'Automne - Birds of a Feather
Stitched 1 over 1, using DMC threads on 28ct natural linen

Since we have been immersed lately in all things chicken, I couldn't help but be drawn to The Sarah Whiteley Sampler. I love the crazy looking chickens in it!

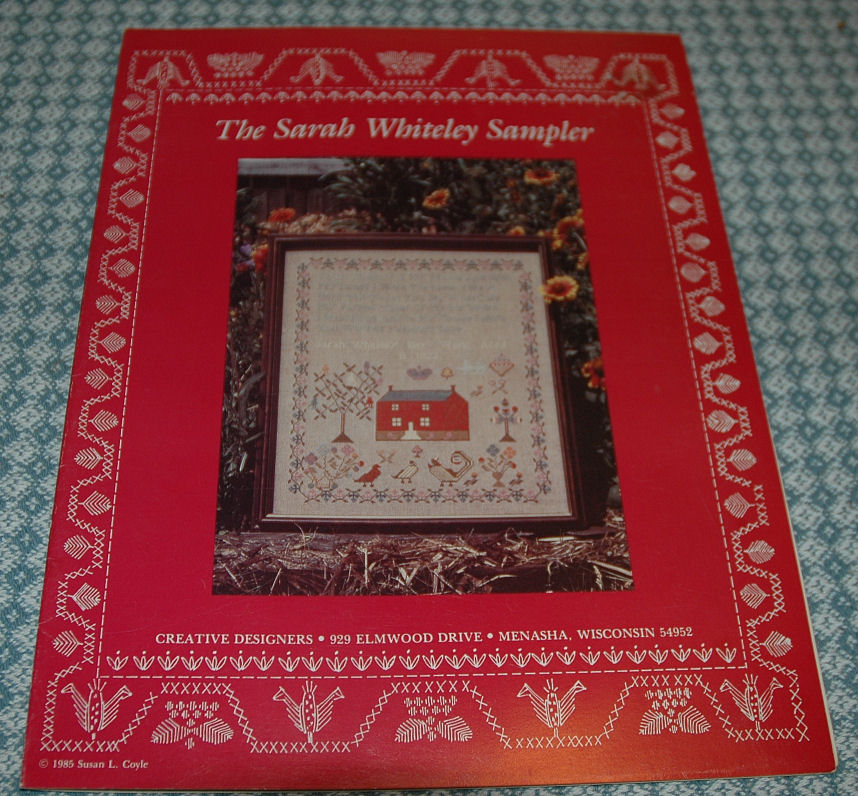
The Sarah Whiteley Sampler -Reproduction of an 1823 sampler

This is an oldie from 1985, from Susan L Coyle of Creative Designers.

I made a start.

There is something amiss here though. I started in the center the way I always do, and then moved to the left side, and up to the top. I was really surprised to find how much fabric I had at the top. Gives you a very uneasy feeling that there won't be enough on the bottom. There is also more on the left margin than there should be. I have measured this so many times. Mathematically, it seems to be reasonably correct, but my sense is that something is wrong. I am also wondering if the stated finished size is correct. Hmmm! I was thinking of re-doing it, but I would really hate to do that. Aggravating!

The chickens are keeping us in stitches! They are such funny little things! They seem to double in size in front of our eyes. When they were little, I would feed them the small bits from the bottom of the popcorn bag. The mere crinkle of the bag sent them into a frenzy! I created a monster, or monsters I should say. Now they come to my door to beg for popcorn, the silly things! I had no idea that chickens could interact so much with people. I'm afraid they have become unintended pets!
Chickens calling!

Thursday, May 31, 2012

Late TUSAL and some progress

This spring has been incredibly turbulent for us! One thing after another. Last week, my brother-in-law had a stroke. It turned out to be a relatively small one. He was very lucky. It totally upset all of us though. Thankfully he is home now and doing well.
Anyhow, here is my very late TUSAL.

Lots of orange from the pumpkins and her hair.

I completely underestimated how long this design would take to complete. All of those swirling vines, etc take a lot of looking at the chart, which slows things down. The basket also took forever. I know there are many mistakes in that basket, but they will have to stay there! LOL!

For a long time, we have wanted to have chickens. Years ago when we moved in, there were chickens living on the property. They had basically gone wild. Needless to say, they did not meet with a good end with all the raccoons around here.
Keith was furloughed from his job for 3 weeks in April. This came as a surprise to us. We certainly were not ready for it. Financially we took quite a hit, but we made use of the time to construct a chicken coop. We had fun doing this!
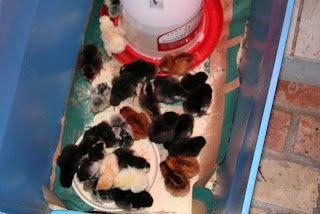
We ordered the day-old chicks from McMurray Hatcheries. We ordered the "Rainbow Layers" mixture. Looking at them now, I cannot believe they came in this little box. Here I am picking them up at the Post Office.


 We got them April 1st, so they spent the first month of their lives in a plastic box in my foyer.
It is amazing how quickly they grow. They seem to double every other day. We were up to three containers before they were big enough to put them outside (Thank God)!

It was not without its harrowing moments!

Here they are at 4 weeks old, finally out in the coop.

The weather has been warm, so we have been experimenting with letting them out of the pen. Of course this required putting up fencing to keep them out of the neighbor's yard. We still have more areas to fence, but so far they seem to keep to the wooded areas in the yard. I have to keep an eye out for hawks though. We have quite a few of them here.
Here is a picture of Millie that I took this morning:
They will be 9 weeks old tomorrow. They should start laying eggs between 22 and 24 weeks. We should have eggs by October!

Over the Memorial Day weekend, Keith harvested the first honey of the season. We got about 40 bottles. We were hoping for more, but it seemed like a short spring for the flowers. Hopefully, we can harvest again around the 4th of July. The bees seem happy though.
Back soon!
Erica