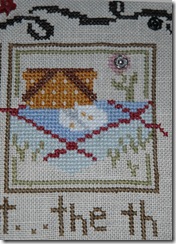
(Click to enlarge)
The Chase is finally framed!
Hooray, Hooray, Hooray!
I was beginning to think it would never happen!
I had no luck finding a framing shop, so I decided to take on the job myself!
This is no small job in itself, but it was met with frustration all along the way!
First, I had a lot of trouble finding a frame. After months of searching estate sales and thrift stores, I finally found a plain wooden frame. You wouldn't think this would be hard, but it seems like all the frames being made today are either metal, plastic, or laminated with some kind of plastic. I wanted a simple wooden frame.
Finally I found an 18" X 24" frame at an estate sale. The frame itself was unremarkable, probably from the late 60's or early 70's. It was the closest in size that I could find, but it was still too big for the sampler. With some persuasion, I got my husband to cut it down for me. He was hesitant to do it, but it turned out very well. The older frames, unlike the laminated ones of today, cut very easily. Other than a dark stain, it had no finish on it, so I rubbed it with Danish Finishing oil to give it a nice sheen.
I had already washed the sampler by adding hot water to Orvus soap, making a lot of suds. I let the temperature cool to luke warm, and then squeezed the suds through the sampler. It was dirtier than I thought with 38 years of dust on it! I rinsed it several times and laid it flat to dry. Before it was completely dry, I ironed it between two pieces of cloth to remove most of the wrinkles. The rest of them came out during the stretching.
I decided to use acid-free foam board. It is really not that much more expensive than regular foam board, and truly does make a difference in conservation.
First I cut the board about a eighth of an inch smaller than the frame opening in the back.
I centered the sampler over the board using pins in the corners and on the sides, moving them as necessary until the sampler was centered.
Next, I transferred the pins into the sides of foam, so the sampler could be turned over.
Using cotton thread, I started lacing from the center, working my way out to the edges. I spaced the lacing about 1/4 inch apart. This is fairly tight lacing, and I probably could easily have spaced it about 1/2" apart with good results, but I really didn't want it to move around. The design itself was not stamped evenly on the linen, so I was dealing with unevenness in the design, as well as the linen. I alternated the direction of the lacing so it would not become skewed in one direction.

This was a very long, tedious process. I was constantly re-threading the needle. If I cut the thread too long, it invariably become tangled!
Slowly, I worked my way to the corners. I just folded the material over, easing the bulk as best I could, and whip-stitched them closed.

Finally, I got it all laced and the corners stitched down.

When I turned it over it looked reasonably even.

Next, I cleaned both sides of the glass with warm water.
I laid the frame out on the table and placed the glass it it.
Because the sampler should not touch the glass. I needed to make spacers from the acid-free foam board. This actually turned out to be one of the hardest parts. I experimented with various shapes and finally decided that a right-angle shape worked best. I wedged these little pieces of foam-board into the corners.
Then, I took the opportunity to remove any remaining cat hairs off the sampler! LOL! It is really best if you can have the cats out of the room while you are doing this! Ha! Good luck with that! Those of you who have cats know what I mean! I have 6 of them!
Finally I placed the stretched sampler into the frame and covered it with another piece of acid-free foam board for the backing.

Next, I covered the back of the frame with brown paper to keep the dust out.

After the adhesive dried, I attached the eyes and wire for hanging.
The only thing left to do now is record the information about the sampler on a piece of paper and attach it to the back of the frame.
That's it! Finis!
 I can never seem to get a good picture of this one. It seems too flooded with light. The colors are a bit bolder than they appear.


